create instance and server setup on google cloud
User Guide For setup Google cloud server (Compute Engine virtual machine instance)
how to set up a LAMP (Linux, Apache, MySQL, PHP) stack on a Compute Engine virtual machine instance.
- Create a virtual machine instance.
- Setup the LAMP stack on your instance.
- Install Phpmyadmin on your instance.
- Setup virtual host in your instance.
- Go to https://console.cloud.google.com
- Go to Compute Engine from the left menu and create a new project
- Choose Account type Individual and tax information Unregistered Individual
- Fill Name & Address & Card Details.
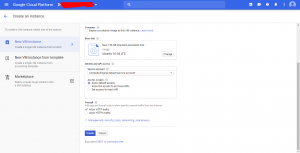
- Create an instance
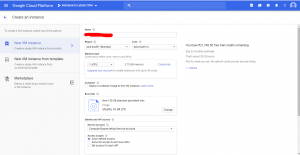
- Fill the following details
- Open SSH and write sudo –s press enter
- sudo apt-get update
- sudo apt-get install apache2 Press enter enter y and press enter again
- sudo systemctl restart apache2
- sudo apt-get install curl
- sudo apt-get install mysql-server
- sudo apt-get install python-software-properties
- sudo add-apt-repository ppa:ondrej/php
- sudo apt-get update
- sudo apt-get install -y php7.2 or 7.4 or 8.0 as per your requirements (if without any version specify install latest version auto run these )
- All: sudo apt install php php-cli php-fpm php-json php-common php-mysql php-zip php-gd php-mbstring php-curl php-xml php-pear php-bcmath
- PHP 7.2: sudo apt install php7.2-common php7.2-mysql php7.2-xml php7.2-xmlrpc php7.2-curl php7.2-gd php7.2-imagick php7.2-cli php7.2-dev php7.2-imap php7.2-mbstring php7.2-opcache php7.2-soap php7.2-zip php7.2-intl -y
- PHP 7.4: sudo apt install php7.4-common php7.4-mysql php7.4-xml php7.4-xmlrpc php7.4-curl php7.4-gd php7.4-imagick php7.4-cli php7.4-dev php7.4-imap php7.4-mbstring php7.4-opcache php7.4-soap php7.4-zip php7.4-intl -y
- PHP 8.0: sudo apt install php8.0-common php8.0-mysql php8.0-xml php8.0-xmlrpc php8.0-curl php8.0-gd php8.0-imagick php8.0-cli php8.0-dev php8.0-imap php8.0-mbstring php8.0-opcache php8.0-soap php8.0-zip php8.0-intl -y
- sudo nano /etc/apache2/mods-enabled/dir.conf
- sudo systemctl restart apache2
- sudo systemctl status apache2
- sudo nano /var/www/html/info.php and paste following line :- <?php phpinfo();?>
- sudo apt-get install phpmyadmin apache2-utils
- sudo nano /etc/apache2/apache2.conf and paste following line on bottom of file :- Include /etc/phpmyadmin/apache.conf
- sudo service apache2 restart
- sudo a2enmod rewrite
- sudo apt-get install git
- sudo a2enmod expires
- sudo a2enmod headers
- sudo apt-get install apache2-utils
- sudo a2enmod cache_disk
- sudo a2enmod rewrite
- sudo apt-get install zip unzip
- sudo systemctl restart apache2
If http://ipaddress/phpmyadmin/ is not working then run these commands:
- sudo apt install software-properties-common ca-certificates lsb-release apt-transport-https
- sudo apt-get install phpmyadmin apache2-utils
- sudo apt install phpmyadmin php-mbstring php-gettext
- sudo ln -s /etc/phpmyadmin/apache.conf /etc/apache2/conf-available/phpmyadmin.conf
- sudo a2enconf phpmyadmin
- sudo service apache2 reload
Another Useful server command
- To open port configuration file: –
Run: nano /etc/apache2/sites-enabled/000-default.conf
<VirtualHost *:81>
ServerAdmin webmaster@localhost
DocumentRoot /var/www/project_name/public
ErrorLog ${APACHE_LOG_DIR}/error.log
CustomLog ${APACHE_LOG_DIR}/access.log combined
<Directory “/var/www/project_name/public”>
Options Indexes FollowSymLinks MultiViews
AllowOverride All
Order allow,deny
Allow from all
</Directory>
</VirtualHost>
- To Open Port config file
- RUN : nano /etc/apache2/ports.conf
- Add : Listen 81
- To Apache Server Restart:- sudo service apache2 restart
- To Clear apache server log: – > /var/log/apache2/error.log
- To check server error log: – cat /var/log/apache2/error.log
- To open php.ini file:- nano /etc/php/7.2/apache2/php.ini


